Showing posts with label sewing. Show all posts

Wednesday, 25 September 2019

Pauline & Alice Serra Jacket


Can't believe it's been 8 months since my last post. These days I'm more active on Instagram, but when I really want to document a project more thoroughly, blogs are still where things are at.

I had bought 3 yards of Rag & Bone Olive Stretch Twill from Mood Fabric in March on their 'Green fabric sale' day - impulsively, I regret to say. But I did need a light jacket for transitional weather, so I started collecting inspirations.
Snapshot of my Pinterest board

It took me forever to decide on the details but in the end this is what I came up with. I hoped the gold snap buttons inside and the black corduroy collar would make it look more like an adventurer jacket than an army uniform.


For the sewing pattern I chose Pauline & Alice's Serra Jacket, because of the sheer number of options it offers, and I wanted a detachable hood and raglan shoulders and the pattern fitted the bill perfectly. I wanted to combine the views A and C and watching the P&A's online tutorial in hacking the pattern was crucial  - otherwise I wouldn't have known I had to extend the neckline for C.

I made a muslin of size small as I was going for a boxy fit, which fitted well except I had to make some narrow shoulder adjustment (not enough as it turned out to be). I also made multiple construction changes including:
  • Making sleeves two pieces - this was easy, as I just had to cut from the shoulder point, smooth the lines, and added seam allowances.
  • Making back two pieces - again, straightforward. I just added seam allowances to the back piece.
  • Using reverse flat felled seams for all seams - next time I'll do proper flat felled seam.
  • Interfacing the hems of the jacket
  • Making it buggy-lined - for this I referred to my jacket making bible, Tailoring. It entailed drafting front facing to extend to the side seams and creating a half lining piece for the back. 

Modified front-facing
From left to right, Even feed walking foot, Stitch in the ditch, and the default foot

Since I plan to sew more jackets, I invested on some sewing accessories. It was my first time using foots other than the plain default foot or the zipper foot, and I was amazed at how much differences they made. My edge stitching definitely improved thanks to the foot.

I tried lots of techniques for the first time in making this jacket; first buggy lining, first snap buttons, first zipper placket, and least but not last, first pad stitching. I used muslin scraps for interfacing, and used the opportunity to practice pad-stitching. I'm not proud of the stitches, but they hold the muslin and the fabric, and don't show on the outside, so I'm pleased. I also like the fact that I found uses for old muslin pieces. It's more environmentally friendly too. Moving forward I plan to use it more for medium weight interfacing.
I used muslin scraps for interfacing, pad-stitched with Gutermann cotton thread

And here's the finished jacket! I'm so so pleased with the result.
With the hood closed. The buttons actually align, if you look at it from a certain angle. :p

The back and the sleeves are modified into two pieces.

For the first time, I'm not embarrassed to show the inside of the garment I made.

Buggy lined back. There's even a hanging loop!
This jacket begs to be styled with binoculars.

What's my verdict on the pattern? Two thumbs up! The instructions are on the light side so I had to refer to my Barbour jackets and the Tailoring book to figure out lots of things. Definitely not for beginners. But the classic style, easy fitting, and lots of options make this pattern a great investment. I'm already dreaming of making a mix of B and C in brown corduroy.

But next time:
  • Remove extra fabric around front shoulder seams to make shoulder narrower (or just make a smaller size)
  • Change the pocket to cargo or box pleat pockets, if making a similar style jacket.
  • Reduce hood depth.
  • Invest on a better zip, maybe. The one from Joann isn't very smooth.
  • If making unlined or partially lined, shorten the hem facing so that the stitching line is close to the hem binding (see the picture below).
Should have shortened the hem. This was highest I could go without overlapping with the pockets.
This is a milestone in my longer term goal of making a custom tailored tweed jacket, and I think I'm better equipped in terms of my skill sets thanks to sewing this jacket. It isn't 100% finished yet. I still need to make the belt, and I might add a breast pocket after all. But I'm ready to start wearing this right away (weather permitting)!

And now to figure out what to do with the other olive cotton fabric I impulsively bought the same day...

Saturday, 18 August 2018

Navy Linen Summer Jacket

This must be the most advanced thing I've made so far. It was my first foray into tailoring, and I thought I should start with an easy project. So I chose a linen unlined jacket as my first project, mistakenly thinking an unlined jacket would be easier than a lined one.

The pattern I used is Simplicity 6685, from the 60s.


It's a good enough pattern with a nice silhouette, and perfect length to wear with trousers as well as skirts. But it didn't have roll lines or two piece sleeves which I later learnt were necessary details for good quality tailoring.

After much deliberation I decided to just go for it, almost as a test to see whether tailoring is something I could get into. I was mentally ready to throw the whole thing away in case it didn't work out.


Based on the muslin, I estimated the roll line. After trying it on, I decided to follow the pattern and add another buttonholes, and raise the roll line. Surprisingly it worked out. The pattern is also for lined jacket, so I had to do a lot of research and guess work to figure out how to make it unlined.


I also finally tried my hand at bound buttonholes, which were not as complicated or difficult as I imagined. The one above was my second try, which didn't turn out too badly if I may say so myself.

One mistake I made was choosing a fabric that was too heavy and too easily frayed. As you can see on the picture above, it frayed like no man's business, and I'd find pieces of the fabric everywhere in the house, not to mention it made sewing more finicky than it could have been. 
The most critical mistake I made was deciding to finish the seam with rayon seam binding AFTER I've put all the pieces together. Man, did it make my life difficult. Well, one lives and learns.

But in the end it all worked out okay.

I finished the jacket with horn buttons that I ordered from Etsy. I love the slight texture and the weight of natural horn buttons.

I also faced the buttons because I was worried the fabric won't hold. I just used whatever small black buttons I could find at Joann.

The jacket is far from perfect, and the inside is ugly to say the least because I struggled with the rayon seam binding, but I'm very proud of the thing and I'm certain I'll get a lot of wear out of it.

So, is tailoring something I'll do more of it? Absolutely. I like the fact that it's a slow, labour intensive process, that requires mastering a wide range skills and high level of craftsmanship. And things can only get better from here. I already plan to make a tweed jacket for the winter. Next time I might even try the traditional method with hair canvas and everything.

As a note to myself, next time:
  • Choose a lighter weight linen
  • If doing hongkong finish or rayon seam binding, finish the seams BEFORE sewing the pieces together
  • Add a self hanger loop
Here's to tailoring!

Sunday, 12 August 2018

Linen Colette Laurel Top

Being a knitter and a seamstress, I cannot help but notice the costumes in any films or TV shows I watch, especially if it's based in the olden days.
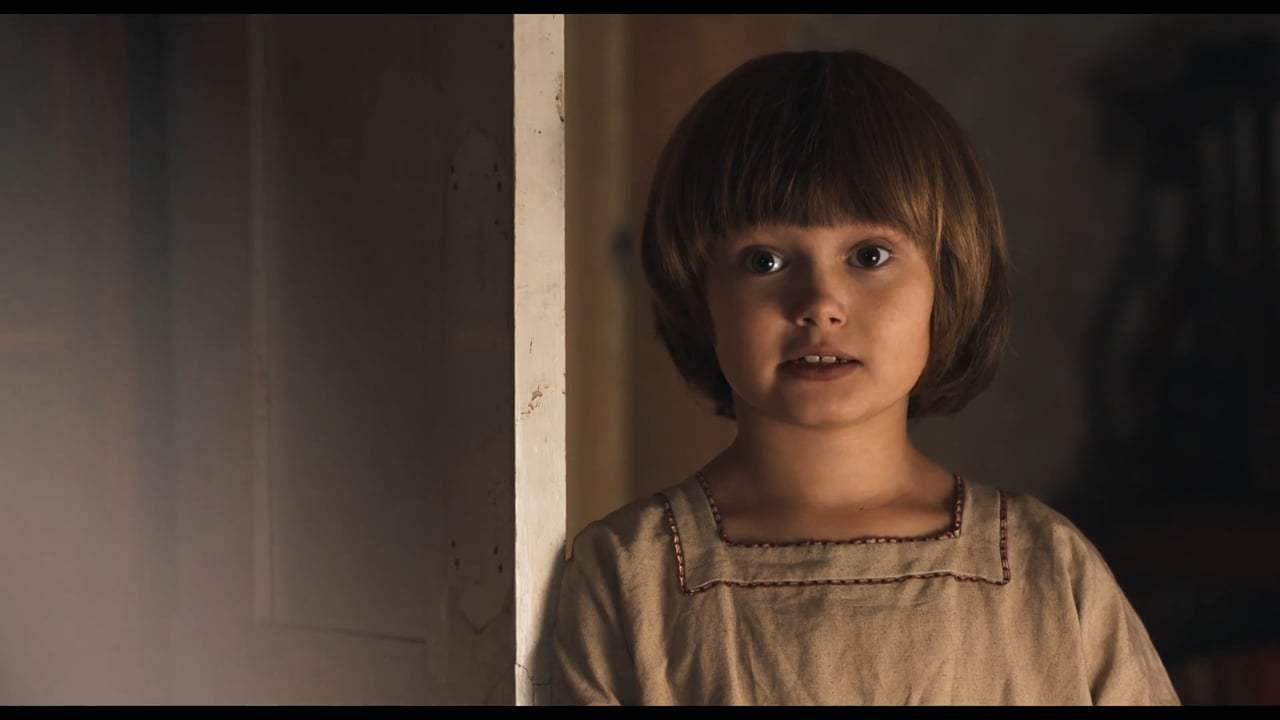
I watched Goodbye Christopher Robin when I was on a plane, having had run out of things to do. I found it a delightful little film, and I was very much taken by the wardrobe of the young Christopher Robin. One outfit in particular stuck out to me, which was the linen - one assumes - square neck top. It has piping details around the neck and is in beige linen, and I do want to recreate it more faithfully one day. But in the meantime, I'm going with a more conventional naval colour schemes for the summer.


This was my first Colette Laurel, and I'm generally pleased with it. It needed minimum modifications - taking shoulders in and adjusting for the sway back, and I was ready to go.
Originally I closed the back seam but after trying it on for a couple of times decided to add the back zip. On hindsight, I wonder a side zip might not have been a better choice. This was the first time I tried rouleau loop closure, and I'm quite pleased with the result. 


There are a few things I would have done differently, looking back. I'd have removed the back pleats to make it more boxy, thus getting rid of the need for the zipper. I'm also not entirely happy with the sleeve heads (the bane of my life). I'd just have to pay more attention next time or just get rid of the ease altogether. 
But all in all it's something I'd wear comfortably, if not to work then at weekends.


The one on the left is a heavy linen jacket that I've been working on for nearly a month. I'm waiting for the rayon seam binding to arrive and then I'll be able to finally finish it. I'll write a separate post when that happens.

Friday, 4 May 2018

Some endings and some beginnings

 A lot has changed since my last post. I moved in with my boyfriend Sean to a new place. It's goodbye to my carefree days of living on my own, but we decided it was time.

One of the most exciting things about the new place, apart from the garden, is that I have a space to claim as my crafts room! I can leave things all over the place and don't have to clean up every time after sewing.
Thanks to the new space, I already finished two dresses since I moved in mid-March. 

It's the ever famous McCall's 6696 which deserves its reputation. It was my first time to sew shirt collars with a stand, and the instruction was easy to follow and things worked out perfectly! Next time I'll shorten the bodice just a tad, but otherwise I'm chuffed with this one. 

Next is based on the shirt dress pattern from Gertie's book of better sewing.

This one wasn't as successful. I don't know what I did, but the bottom of the skirt button band keeps rolling back. The instruction was also more difficult to follow due to the rough hand-drawn illustrations. I'd still wear it but this I'll get less use out of this one. 
And one day I might even get a dress form so that I can model it on something other than a cloth hanger.

Even though picking sewing back up means I'm spending less time knitting, it doesn't mean I've been completely neglecting it.
It was Sean's birthday just two days ago, and I finished this slip-on just in time! Once again I used the free Mens fair isle slip-on knitting pattern, but this time I knitted it in round. Now I know why people swear by knitting fair isle in round. It's so much less hassle.


I created the fair isle pattern based on a project I saw on Ravelry. It's quite straightforward and the simple geometry appealed to me. I named the project Escher, because it reminded me of his work Sky and Water I. You can see more details of this work on my Ravelry post.

As soon as I finished with the slip-on I moved on to another project. It's Bestway Tea Time jumper, something I have had in my queue for quite some time.


I'm using old Cascade Heritage Solid yarn for this. It was the 2nd yarn I bought years ago when I first started knitting. It was first knitted into a cardigan, then frogged, knitted into another cardigan, and then frogged again. Hopefully this time it will finally find its purpose because I'm not sure if it can stand another frogging.